 Save to Pinterest
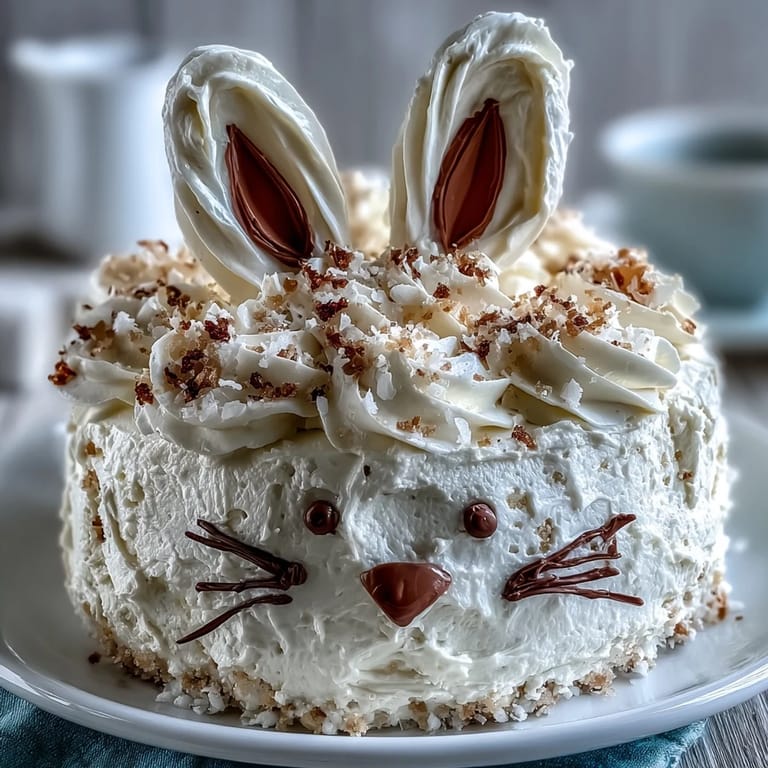
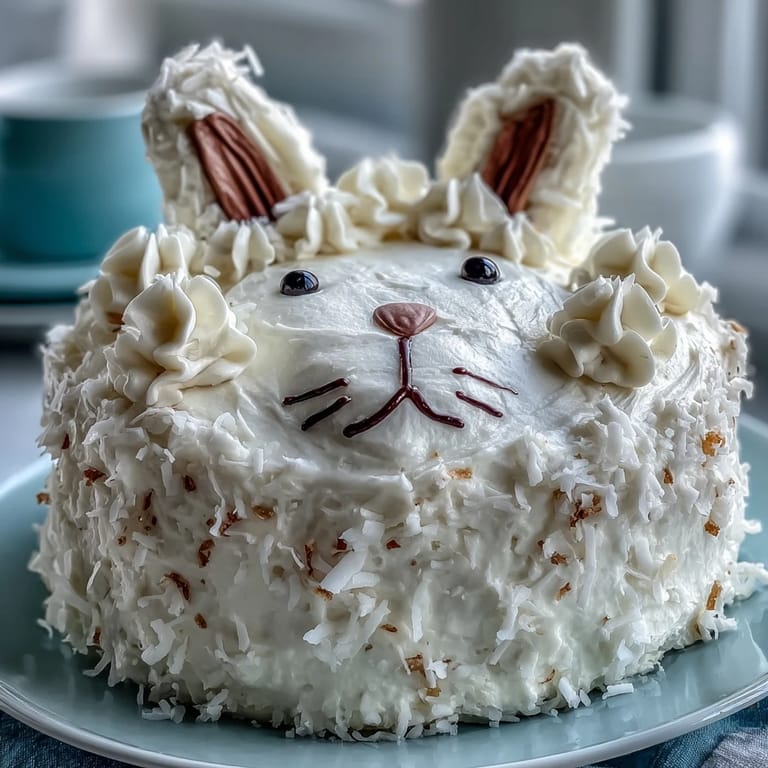
 There's something magical about a cake that brings a smile the moment it appears at the table. This Sparkle Easter Bunny Cake does exactly that—transforming a simple vanilla cake into a whimsical celebration centerpiece. With its fluffy buttercream coat, coconut fur texture, and shimmering gold sprinkles, this adorable bunny is as delightful to look at as it is to eat. Perfect for Easter gatherings, spring birthdays, or any occasion that calls for a touch of playful elegance, this cake combines classic baking techniques with creative decoration to create a dessert that's truly unforgettable.
Save to Pinterest The beauty of this bunny cake lies in its approachable technique. You start with two round cakes—one becomes the face, while the second is cleverly cut to form the ears and even a little bowtie. The buttercream is silky and not overly sweet, providing the perfect canvas for the shredded coconut that mimics soft bunny fur. And those gold sprinkles? They add just the right amount of festive sparkle without overwhelming the design. Whether you're an experienced baker or trying your hand at decorated cakes for the first time, this recipe guides you through each step with clarity and confidence.
Ingredients
Tired of Takeout? 🥡
Get 10 meals you can make faster than delivery arrives. Seriously.
One email. No spam. Unsubscribe anytime.
- For the Cake: 2 ½ cups (315 g) all-purpose flour, 2 ½ tsp baking powder, ½ tsp salt, 1 cup (225 g) unsalted butter (softened), 2 cups (400 g) granulated sugar, 4 large eggs (room temperature), 1 tbsp pure vanilla extract, 1 cup (240 ml) whole milk
- For the Buttercream Frosting: 1 cup (225 g) unsalted butter (softened), 4 cups (480 g) powdered sugar (sifted), 2–3 tbsp whole milk, 1 tbsp pure vanilla extract, pinch of salt
- For Decoration: 1 cup sweetened shredded coconut (for fur), pink gel food coloring (for bunny ears and nose), 2 large marshmallows (for cheeks), 2 mini marshmallows (for teeth), black licorice laces or black gel icing (for whiskers and eyes), gold sprinkles (for sparkle)
Instructions
- Step 1: Prepare the Oven and Pans
- Preheat oven to 350°F (175°C). Grease and flour two 9-inch (23 cm) round cake pans.
- Step 2: Mix the Dry Ingredients
- In a medium bowl, whisk together flour, baking powder, and salt.
- Step 3: Cream Butter and Sugar
- In a large bowl, cream butter and sugar until light and fluffy (about 3–4 minutes).
- Step 4: Add Eggs and Vanilla
- Add eggs, one at a time, beating well after each addition. Mix in vanilla extract.
- Step 5: Combine Wet and Dry
- Alternately add flour mixture and milk to the butter mixture, beginning and ending with flour. Mix until just combined.
- Step 6: Bake the Cakes
- Divide batter evenly between prepared pans. Bake for 30–35 minutes or until a toothpick inserted in the center comes out clean.
- Step 7: Cool Completely
- Cool cakes in pans for 10 minutes, then turn out onto wire racks and cool completely.
- Step 8: Make the Buttercream
- For the buttercream, beat butter until creamy. Gradually add powdered sugar, milk, vanilla, and salt. Beat until fluffy and smooth.
- Step 9: Assemble the Bunny Shape
- Place one cake round as the bunny's face. Cut two ovals from the second round for ears; use the remaining piece for the bowtie. Arrange on a large platter to form the bunny (face, ears, bowtie).
- Step 10: Apply Crumb Coat
- Frost entire cake with a thin layer (crumb coat), chill for 20 minutes, then apply a thick, even layer of buttercream.
- Step 11: Add Coconut Fur
- Press shredded coconut onto the frosted areas for fur.
- Step 12: Add Pink Details
- Tint a small amount of coconut with pink food coloring for the inner ears and nose; arrange accordingly.
- Step 13: Create Facial Features
- Use marshmallows for cheeks and teeth, black licorice laces or gel for whiskers and eyes.
- Step 14: Add Gold Sparkle
- Decorate with gold sprinkles for a sparkling finish.
- Step 15: Serve
- Serve and enjoy!
Zusatztipps für die Zubereitung
Ensure all your ingredients—especially butter, eggs, and milk—are at room temperature before you begin. This helps create a smooth, evenly mixed batter and prevents the butter from seizing when combined with cold liquids. When assembling the bunny shape, use a serrated knife for clean cuts and take your time positioning the ears and bowtie before you start frosting. The crumb coat is essential: this thin first layer of buttercream seals in any loose crumbs, making your final frosting layer beautifully smooth. Chill the crumb-coated cake for at least 20 minutes to set the frosting before applying the final layer. When pressing coconut onto the cake, work in small sections and use gentle pressure to ensure it adheres well without disturbing the buttercream underneath.
Varianten und Anpassungen
For a chocolate version, substitute ½ cup flour with unsweetened cocoa powder to create a chocolate bunny cake with rich flavor. If you prefer a more subtle sweetness, reduce the sugar in the buttercream by ½ cup and add an extra tablespoon of milk for a lighter frosting. Gold leaf or edible gold dust can be used for extra shimmer if you want an even more elegant finish. You can also experiment with different colored coconut—try pastel colors for a springtime rainbow effect. For those with dietary restrictions, the recipe can be adapted with gluten-free flour blend and dairy-free butter alternatives, though texture may vary slightly.
Serviervorschläge
This stunning bunny cake deserves a grand presentation. Serve it on a large platter surrounded by fresh spring flowers, colorful Easter eggs, or pastel ribbon for a complete holiday tablescape. Pair each slice with a glass of sweet sparkling wine or freshly made lemonade for a festive touch that complements the vanilla sweetness. For children's parties, serve alongside fresh strawberries and whipped cream. The cake stores well covered at room temperature for up to 2 days, or refrigerated for up to 5 days—though bring it to room temperature 30 minutes before serving for the best flavor and texture. Cut with a sharp knife wiped clean between slices to maintain the beautiful layers and keep the coconut decoration intact.
 Save to Pinterest
 Creating this Sparkle Easter Bunny Cake is more than just baking—it's an experience that brings joy to everyone involved, from the mixing and baking to the final decorative flourishes. The combination of moist vanilla cake, silky buttercream, and whimsical bunny design makes this dessert a memorable addition to any celebration. Whether you're making it for Easter, a spring birthday, or simply to brighten someone's day, this cake delivers both visual impact and delicious flavor. The gold sprinkles add that final touch of magic, catching the light and making your bunny truly shine. So gather your ingredients, enlist some helpers for the decorating fun, and prepare to create a cake that will be remembered long after the last crumb is gone.
Questions & Answers
- → How do you shape the bunny from regular cake layers?
Use two 9-inch round cakes: one as the face, cut the second to create ears and a bowtie, then arrange them to form a bunny shape.
- → What ingredients create the fluffy buttercream frosting?
Softened unsalted butter, powdered sugar, milk, vanilla extract, and a pinch of salt are beaten until smooth and fluffy.
- → How is the fur texture achieved on the bunny cake?
Sweetened shredded coconut is pressed onto the buttercream frosting to mimic the bunny's fur texture.
- → Can the cake be prepared in advance?
Yes, the cake can be baked and decorated ahead. Store covered at room temperature for 2 days or refrigerated up to 5 days.
- → What alternatives can add sparkle to the cake decoration?
Besides gold sprinkles, edible gold leaf or gold dust can enhance the shimmering effect on the finished cake.