 Save to Pinterest
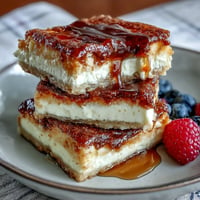
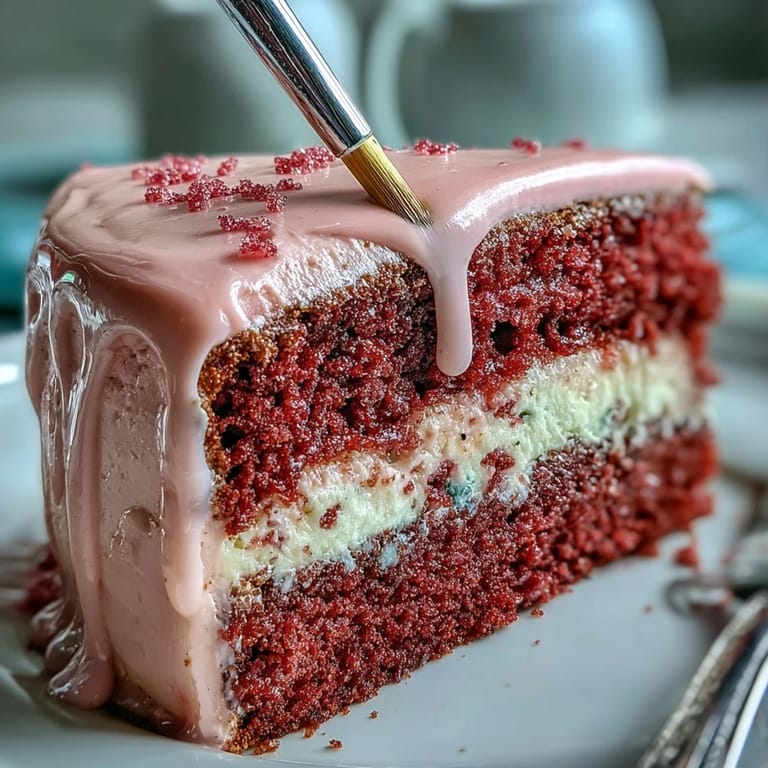
 Whenever I catch the faint scent of rosé and cocoa wafting from my oven, I'm instantly reminded of the first spring afternoon I baked this blushing velvet cake. I didn't intend for it to be a showstopper—someone just asked for "something festive and fun" for their bridal shower. The blush-pink crumb, gentle wine aroma, and that glossy gold drip ended up stealing the whole party. There's just something celebratory about a cake that sparkles on the table. The process feels indulgent—almost like you're crafting a bit of edible art for a most-loved friend.
I'll never forget when I baked this for my cousin's bridal shower last March. We huddled around the kitchen counter, sneaking tastes of the buttercream, and left a light trail of pink crumbs on every surface. The playlist moved from love songs to laughter, and by the time I crowned the cake with its shimmering gold drip, even the self-appointed "brownie-only" eaters couldn't resist a slice. I watched guests snap photos before they even took a bite—that's when I knew this recipe had a kind of magic. It always brings a touch of that giddy, festive energy to the table.
Ingredients
- All-purpose flour: Choose high-quality flour and always sift for a fluffy crumb; a tip I learned after my first attempt turned out dense.
- Granulated sugar: Proper creaming makes for lighter texture, so don't rush this step.
- Baking soda and baking powder: Both are essential to give lift and ensure even layers.
- Salt: Just a touch sharpens the sweetness without making things salty.
- Unsweetened cocoa powder: Adds a subtle depth and blush tone without overpowering.
- Unsalted butter: Room temperature butter is a must for an evenly creamed base.
- Buttermilk: Use at room temperature for a tender crumb—cold buttermilk can make the batter lumpy.
- Rosé wine: Choose a fruity, not-too-sweet bottle – it should be something you'd actually enjoy drinking.
- Large eggs: Let them sit out so they blend seamlessly into the batter.
- Vanilla extract: Even a splash boosts the overall aroma and flavor.
- White vinegar: This little ingredient keeps the cake plush and helps the color pop.
- Pink food coloring gel: Use gel and add gradually for a soft blush hue – liquid coloring can water down the batter.
- Cream cheese: Ensure it's fully softened before mixing to prevent lumpy frosting.
- Powdered sugar: Always sift to avoid a gritty texture in your cream cheese frosting.
- Edible gold luster dust: A little goes a long way to make your cake look dazzling without overpowering the flavor.
- White chocolate chips: Melt gently and cool to avoid splitting during the drip stage.
- Heavy cream: Blends with white chocolate to create a smooth, pourable drip.
- Vodka or clear extract: Used for mixing luster dust into a shimmery gold paint for the final touch.
Tired of Takeout? 🥡
Get 10 meals you can make faster than delivery arrives. Seriously.
One email. No spam. Unsubscribe anytime.
Instructions
- Get the pans ready:
- Preheat your oven to 350°F and line three 8-inch cake pans with parchment—I swear, there's real satisfaction in greasing the corners just right.
- Sift and combine dry ingredients:
- In a medium bowl, sift the flour, cocoa, baking soda, baking powder, and salt until they form a soft, even mound.
- Cream butter and sugar:
- Beat the butter and sugar together until they're pale and fluff up beneath your beater, like frosting already in the making.
- Add eggs and flavor:
- Add eggs one at a time, mixing thoroughly, then blend in the vanilla for a fragrant, silky base.
- Incorporate liquids and dry mix:
- Pour in the buttermilk, rosé, and vinegar, then add the dry mix in batches, stirring just until the flour disappears.
- Blush it up:
- Swirl in pink food gel little by little, stopping when you reach your perfect shade of bride-worthy blush.
- Bake and cool:
- Divide the batter between pans and bake 30–35 minutes, or until a toothpick comes out clean; let cool in the pans before turning onto a rack.
- Frosting time:
- For the frosting, beat softened butter with cream cheese until smooth, then add sifted powdered sugar, rosé, vanilla, and salt for an airy, tangy finish.
- Layer and crumb-coat:
- Level cooled layers if needed, stack with frosting between each, and swipe on a thin crumb coat before chilling the cake for 30 minutes.
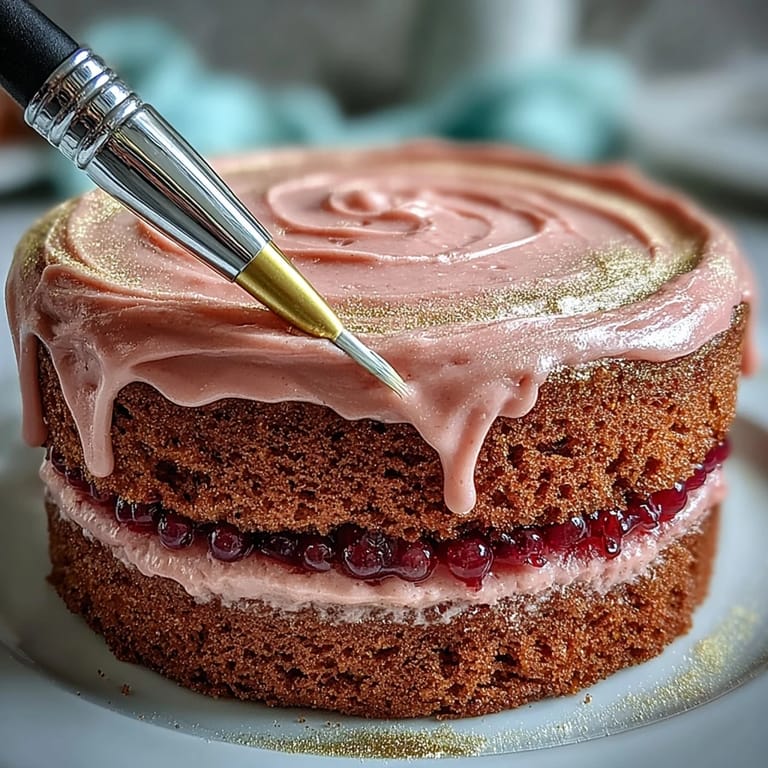
- Final frosting and gold drip:
- Give the chilled cake a generous final coat of frosting; for the drip, gently melt white chocolate and cream, cool, then drip over cake edges using a squeeze bottle or spoon.
- Paint the gold:
- Mix gold luster dust with vodka or extract and brush it over the drips for a gilded finish that practically sparkles under the lights.
- Chill and serve:
- Let the finished cake chill at least 30 minutes before serving so every slice holds its shape perfectly.
 Save to Pinterest
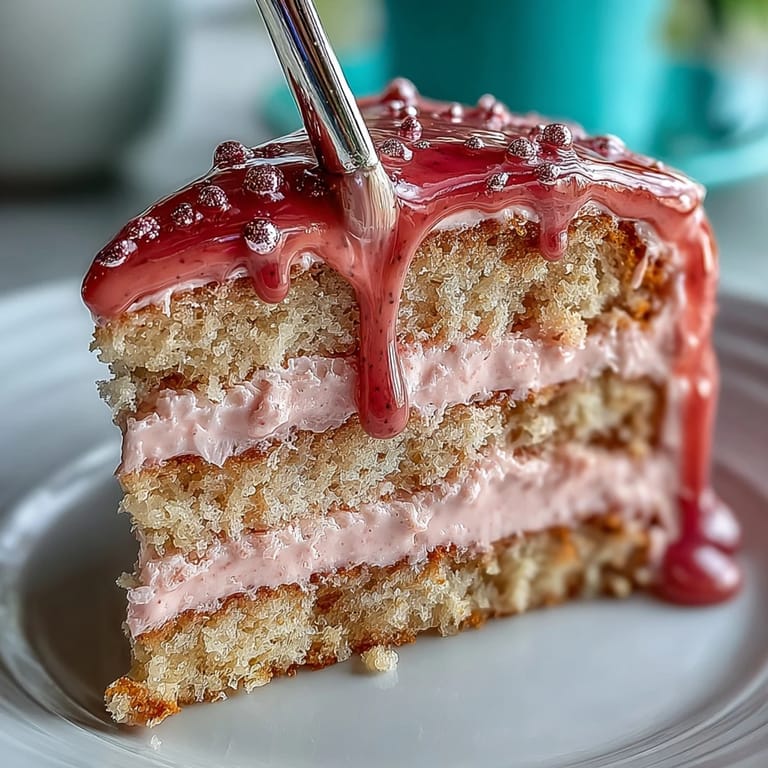
 At my friend Lena's engagement party, nobody even remembered to cut the main cake until halfway through because everyone was too busy admiring the shimmering gold drips and fragrant pink slices of this beauty. A guest even pulled me aside just to whisper, "This is the most romantic thing I've eaten." That was the day this cake became not just a dessert, but a sparkling centerpiece that sets the mood for celebration.
Creating a Cake That Wows
A big part of making this cake feel so special is going slow and savoring each step. Letting the butter and sugar cream together fully fills the kitchen with sweet, toasty scents, and there's something calming about watching the frosting whip up perfectly smooth. If you can, hand paint the gold at the last minute—the shimmer is a little addictive once you see it in the daylight. Even if your layers aren't perfectly straight, a generous coating of frosting and glittering gold makes everything look intentional and bold.
Decorating for Celebrations
Don't stress if your drip isn't picture-perfect on the first try—imperfections end up feeling more bespoke. I love laying a few edible flowers on top or scattering fresh berries for color contrast, which always make guests double-take. Even edible gold leaf, in small torn flecks, creates that ultimate bridal glow. For extra drama, use a tall cake stand and arrange delicate gold-painted forks beside each plate.
Switching Up the Flavors
If you want to make this cake non-alcoholic, a sparkling grape juice swap works surprisingly well. Try experimenting with a raspberry or strawberry purée brushed onto the finished cake for a burst of fruit. And if you're feeling daring, a drop or two of orange blossom water in the frosting delivers an unexpectedly elegant perfume, especially in spring.
- Use a piping bag for decorative swirls along the top edge.
- If you chill the cake overnight, allow it to sit out 30 minutes before slicing.
- Always double-check that your gold luster is labeled edible, not just decorative.
 Save to Pinterest
 Whether you're celebrating a big moment or just hoping to surprise someone special, this rosé velvet cake will bring a little extra sparkle to your table. Don't be afraid to make it your own and decorate with love—that's what makes every slice unforgettable.
Questions & Answers
- → How can I boost the rosé flavor without overpowering the cake?
Brush each cooled layer lightly with reserved rosé before assembling and add a small splash to the frosting. Taste as you go: a little goes a long way. For a subtler note, reduce the rosé briefly in a saucepan to concentrate flavor, then cool before using.
- → What non-alcoholic substitute works for the rosé?
Use sparkling grape juice or a non-alcoholic rosé alternative. You can also reduce grape juice to intensify flavor, then cool before adding to batter or frosting to avoid thinning.
- → How do I get an even blush-pink color in the batter?
Use gel food coloring for concentrated pigment and add a little at a time until the desired shade is reached. Mix just until combined to avoid overworking the batter and fading the color.
- → What temperature should the chocolate drip be for best results?
Let the white chocolate and cream mixture cool to warm (slightly viscous, not piping hot) before applying. Test on the edge of the chilled cake; it should flow slowly to form droplets without running straight off. Chill briefly between applications if needed.
- → How far ahead can I assemble and decorate the cake?
You can bake layers a day ahead and wrap them tightly. Assemble and decorate the day of or the evening before; chill after decorating to set the drip and frosting. Bring to lightly cool room temperature before serving for best texture.
- → Can I adapt this for common allergens like dairy or eggs?
For dairy-free, swap butter and cream cheese with firm plant-based alternatives and use non-dairy cream in the drip. Egg replacers or commercial egg substitutes may work for the batter, but expect slight texture differences; test one change at a time for best results.