 Save to Pinterest
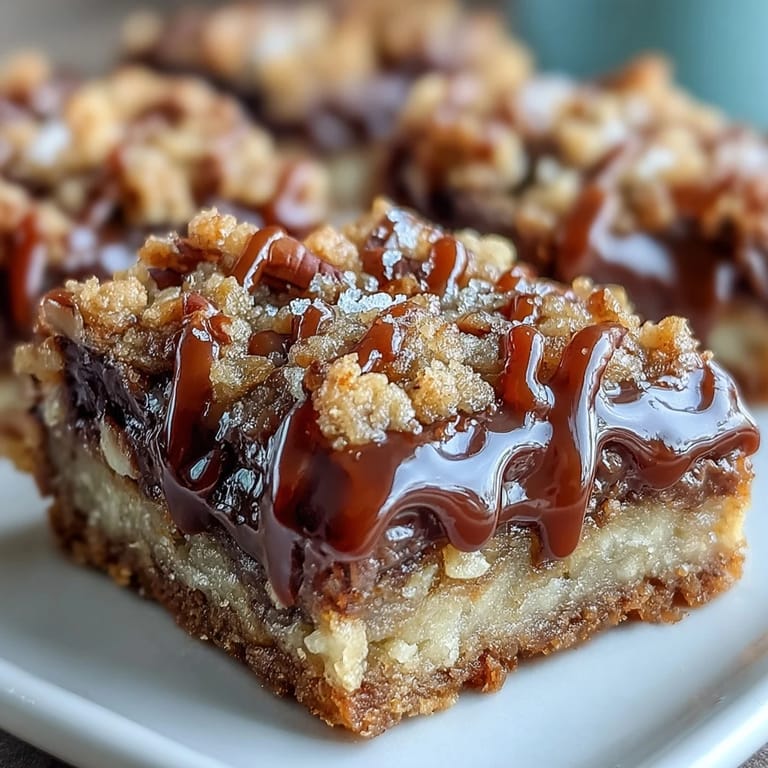
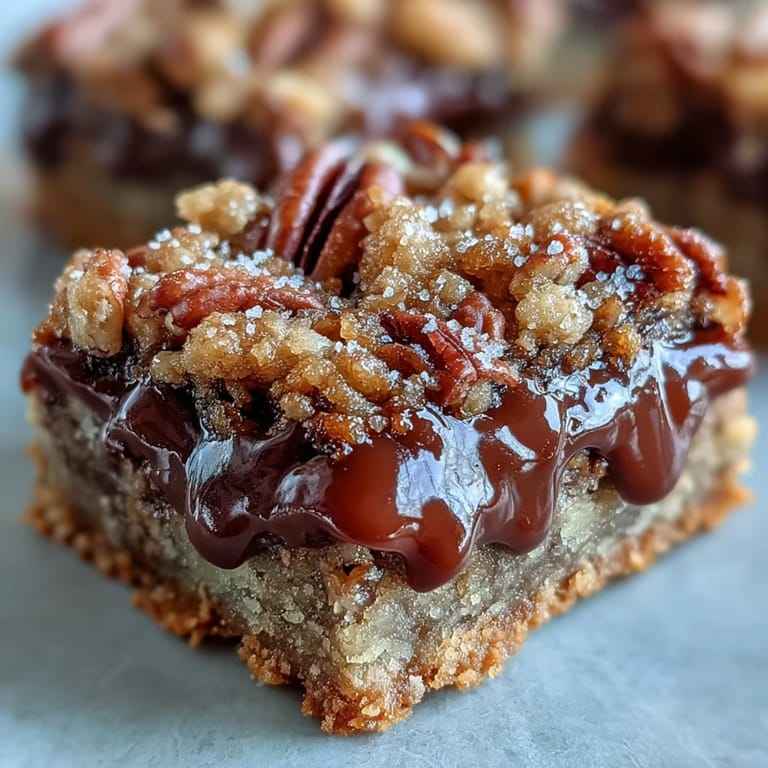
 My neighbor once knocked on my door holding an empty plate, asking if I had "those caramel things" left over. She meant these turtle bars, which I'd brought to a block party three weeks earlier. That kind of craving doesn't lie. The combination of buttery oat crust, gooey caramel, toasted pecans, and puddles of chocolate creates something you think about long after the pan is empty. I started making double batches just to keep one hidden in the back of the freezer.
I made these bars the first time during a rainy October afternoon when I needed something sweet but didn't want to fuss with layer cakes or frosting. The caramel bubbled on the stove while I pressed the crust into the pan, and the whole house smelled like a carnival. My husband walked in, saw the pan cooling on the counter, and declared it "dangerously good." He was right. We ate four squares each that night and regretted nothing.
Ingredients
- All-purpose flour: Forms the sturdy base that holds everything together without turning tough or cakey.
- Rolled oats: Add chew and a slight nuttiness that balances the sweetness, plus they crisp up beautifully on top.
- Packed brown sugar: Brings molasses depth and keeps the crust tender and moist instead of dry.
- Granulated sugar: Works with the brown sugar to create the right balance of sweetness and structure.
- Unsalted butter, melted: Binds the crumb mixture and adds that rich, buttery flavor you can taste in every bite.
- Salt: A small amount sharpens all the flavors and keeps the sweetness from becoming one-note.
- Baking soda: Helps the crust and topping puff slightly and turn golden as they bake.
- Semi-sweet chocolate chips: Melt into gooey pockets between the crust and caramel, adding bittersweet contrast.
- Chopped pecans: Toast as the bars bake, releasing oils that smell incredible and add crunch.
- Caramel sauce: The heart of the recipe, store-bought works perfectly if you warm it with cream to make it pourable.
- Heavy cream: Thins the caramel just enough to spread evenly and soak into every crevice.
Tired of Takeout? 🥡
Get 10 meals you can make faster than delivery arrives. Seriously.
One email. No spam. Unsubscribe anytime.
Instructions
- Prep the Pan:
- Preheat your oven to 350°F and grease a 9x9-inch baking pan generously with butter, or line it with parchment paper for easy lifting later. A well-prepped pan means clean edges and bars that release without a fight.
- Mix the Crumb Base:
- In a large bowl, stir together flour, oats, both sugars, melted butter, salt, and baking soda until the mixture looks like wet sand and clumps when squeezed. Set aside exactly 1 cup of this mixture for the topping, then press the rest firmly into the bottom of your pan to form an even crust.
- Bake the Crust:
- Slide the pan into the oven and bake for 10 minutes, just until the edges start to turn golden and the surface looks set. This partial bake keeps the crust from getting soggy once you add the wet layers.
- Warm the Caramel:
- While the crust bakes, combine caramel sauce and heavy cream in a small saucepan over medium-low heat, stirring constantly until smooth and glossy. Remove from heat as soon as it's well blended so it doesn't thicken too much.
- Layer Chocolate and Pecans:
- Pull the crust from the oven and immediately scatter chocolate chips evenly across the hot surface, then sprinkle chopped pecans on top. The residual heat will start melting the chocolate, which is exactly what you want.
- Pour the Caramel:
- Drizzle the warm caramel sauce over the chocolate and pecans, aiming for even coverage so every square gets its share. Use a spoon to gently spread it if needed, but don't stress about perfection.
- Add the Topping:
- Sprinkle the reserved crumb mixture evenly over the caramel layer, pressing it down very lightly so it sticks. This top layer will bake into a crisp, golden crown that contrasts beautifully with the gooey center.
- Finish Baking:
- Return the pan to the oven and bake for 15 to 20 minutes, until the topping turns a deep golden brown and smells toasty. The caramel will bubble up around the edges, and that's a good sign.
- Cool Completely:
- Set the pan on a wire rack and let it cool completely before cutting, at least 30 minutes but longer is better. Cutting too soon will result in messy squares that fall apart instead of neat, chewy bars.
 Save to Pinterest
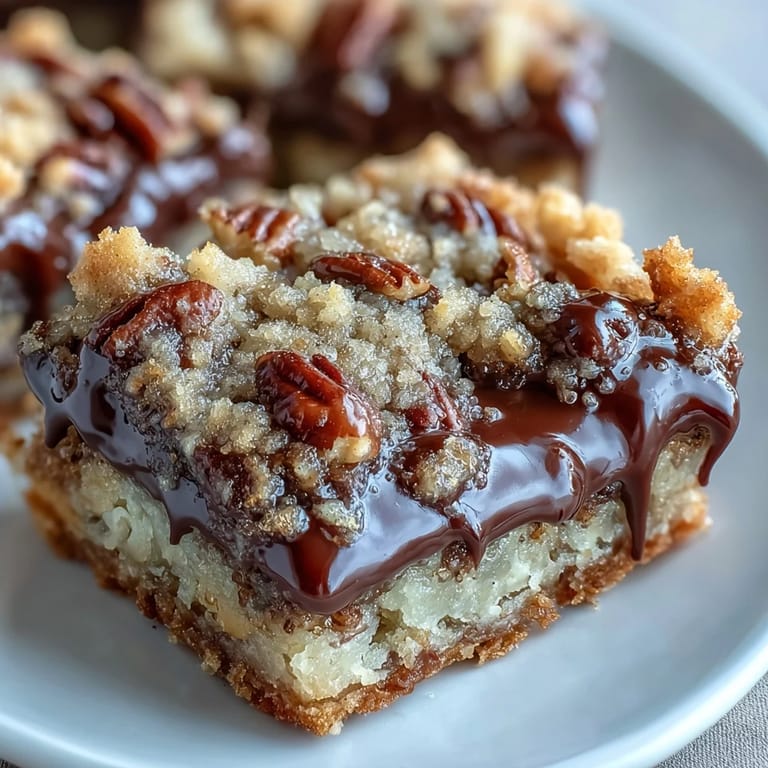
 I brought a pan of these to a friend's birthday dinner, and by the end of the night, people were scraping the corners with their forks and asking if I'd written down the recipe. One guest said they tasted like the inside of a fancy chocolate turtle candy, but better because of the oat crumble. That nickname stuck, and now whenever someone requests "those turtle things," I know exactly what to bake. It's become my signature move when I need to win people over.
Choosing Your Caramel
Store-bought caramel sauce saves time and works beautifully as long as you warm it with cream to get the right consistency. I like the thick jarred kind meant for ice cream because it has a deep, cooked sugar flavor that stands up to the chocolate. If you make your own caramel, let it cool slightly before mixing in the cream so it doesn't seize or splatter. Either way, taste it first and if it's too sweet on its own, a pinch of sea salt stirred in will balance everything perfectly.
Storing and Serving
These bars keep for up to a week in an airtight container at room temperature, though they rarely last that long in my house. If you stack them, slip parchment paper between layers so they don't stick together. I've also frozen them for up to a month, wrapped tightly in plastic and then foil, and they thaw beautifully on the counter. For an extra touch, drizzle melted chocolate over the tops once they're cool, or sprinkle flaky sea salt on the caramel layer before adding the crumb topping.
Customizing Your Bars
Pecans are traditional, but walnuts or almonds work just as well if that's what you have on hand. I've swapped in dark chocolate chips when I wanted something less sweet, and once I used white chocolate with dried cherries for a holiday twist. The oat base is forgiving, so you can even add a handful of shredded coconut to the crumb mixture if you like that flavor. Just keep the proportions of butter and sugar the same, and the bars will turn out chewy and delicious every time.
- Try dark chocolate and a sprinkle of espresso powder for a mocha version.
- Add a handful of toffee bits to the topping for extra crunch and caramel flavor.
- Swap half the oats for quick oats if you want a finer crumb texture.
 Save to Pinterest
 These bars have become the recipe I reach for when I want to feel like I've made something special without spending all day in the kitchen. Every bite delivers that perfect mix of chewy, crunchy, gooey, and rich that makes you close your eyes and take a second to savor it.
Questions & Answers
- → Can I use homemade caramel sauce instead of store-bought?
Yes, homemade caramel sauce works beautifully. Just ensure it's smooth and pourable when warm. If too thick, thin it with heavy cream as directed.
- → How do I prevent the bars from sticking to the pan?
Line your pan with parchment paper, leaving overhang on two sides. This creates easy handles for lifting the entire batch out before cutting into squares.
- → Can I substitute the pecans with other nuts?
Absolutely. Walnuts, almonds, or even cashews work well. Toast them lightly beforehand for enhanced flavor and crunch.
- → Why do my bars fall apart when cutting?
Ensure the bars are completely cooled before cutting. Refrigerating for 30 minutes helps them firm up. Use a sharp knife, wiping it clean between cuts.
- → How should I store these bars?
Store in an airtight container at room temperature for up to one week. Layer parchment paper between stacks to prevent sticking. They also freeze well for up to three months.
- → Can I make these bars gluten-free?
Yes, substitute the all-purpose flour with a 1:1 gluten-free baking blend and use certified gluten-free oats. Check that your chocolate chips and caramel are also gluten-free.